Monthly Archives: July 2012
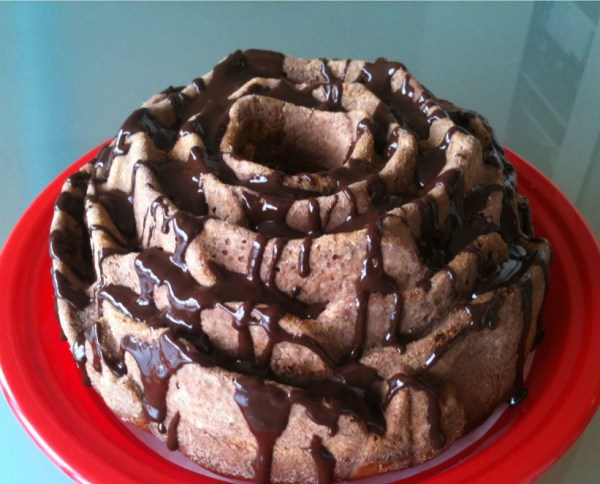
bundt cake
mushroom bacon pizza
today, i took another stab at pizza crust. this time, i doubled the amount of yeast used and proofed it before adding to the other ingredients. a longer rise next time and i think i’ll be at pizza crust nirvana.
Gluten Free Pizza
Ingredients
4 teaspoons active dry yeast or instant yeast
7/8 to 1 1/8 cups lukewarm water (depending on the relative humidity)
2 tablespoons olive oil
3 cups Cup4Cup flour blend (haven’t found the right proportions yet for a homemade blend. C4C does contain milk and can be found at Williams Sonoma or Gilt.com)
1 1/4 teaspoons salt
Method
1) Dissolve the yeast, with a pinch of sugar, in 2 tablespoons of the lukewarm water (take this from the approx. 1 cup of water you have measured). Let the yeast and water sit at room temperature for 15 minutes, until the mixture has proofed.
2) Combine the proofed yeast with the remainder of the ingredients. Mix and knead everything together—by hand, till you’ve made a soft, smooth dough. Don’t over-mix the dough; it should hold together, but can still look fairly rough on the surface.
3) To make pizza up to 24 hours later, skip to step 5.
4) To make pizza now: Place the dough in a lightly greased bowl, cover the bowl, and allow it to rise for about 90 minutes. The rise may not be very obvious.
5) To make pizza later: Allow the dough to rise, covered, for 45 minutes at room temperature. Refrigerate the dough for 4 hours (or for up to 24 hours). This step allows you more schedule flexibility; it also develops the crust’s flavor. About 2 to 3 hours before you want to serve pizza, remove the dough from the refrigerator.
6) Decide what size, shape, and thickness of pizza you want to make. This recipe will make one of the following choices:
Two 1/2″-thick 12″ round pizzas
One 3/4″-thick 13″ x 18″ rectangular (Sicilian-style) pizza
7) Divide the dough in half, for two pizzas.
8) If you’re making a rectangular pizza, shape the dough into a rough oval. For a round pizza, shape it into a rough circle. In either case, you’ll need to pat the dough out to fit the pan. It helps to keep from sticking, if you rub a little olive oil on your hands
9) Lightly grease the pan(s) with olive oil.
10) Place the dough in the prepared pan(s). Press it over the bottom of the pan, pushing it towards the edges.
11) Allow the dough to rise, covered, for about 90 minutes (if it hasn’t been refrigerated); or 2 to 2 1/2 hours (if it’s been refrigerated). Towards the end of the rising time, preheat the oven to 450°F.
13) Bake the pizza crust on the lower oven rack till it looks and feels set on top, and is just beginning to brown around the edge of the crust, but is still pale on top. This will take about 5-7 minutes for thinner crust pizza; about 10 to 12 minutes for medium thickness; and 12 to 14 minutes for thick-crust pizza. If you’re baking two pizzas, reverse them in the oven (top to bottom, bottom to top) midway through the baking period.
14) To serve pizza immediately: Remove it from the oven, and arrange your toppings of choice on top. Return to the oven, and bake on the upper oven rack for an additional 10 to 15 minutes, until the crust is nicely browned, both top and bottom, and the cheese is melted. Check it midway through, and move it to the bottom rack if the top is browning too much, or the bottom not enough.
15) To serve pizza up to 2 days later: Remove the un-topped, partially baked crust from the oven, cool completely on a rack, wrap in plastic, and store at room temperature. When ready to serve, top and bake in a preheated 450°F oven, adding a couple of minutes to the baking times noted above. Your goal is a pizza whose crust is browned, and whose toppings are hot/melted.
16) You can also freeze the un-topped crust for several months in a ziploc type freezer bag. No need to thaw it before heating.
chicken gumbo
so the other week, my auntie mentioned that she was making seafood gumbo for a dinner party and it got me thinking about whether it’s possible to make a passable roux with a gluten free flour blend. i should also admit that this was meant to be chicken andouille gumbo, but i forgot to take the andouille out of the freezer. the great thing about gumbo is that it’s very forgiving, so maybe i’ll add the sausage tomorrow.
here’s a quick & dirty photo tutorial on the gumbo making process. click on the thumbnails to see the photos in full size.
pizza!
elvis’ favorite pound cake with chocolate ganache
this is my adaptation of a pound cake recipe that Darice Murray, winner of best cake at the 2012 marin county fair adapted to make gluten free, using C4C gluten free flour blend. it’s a killer cake, with a perfect texture and rich with butter, eggs and heavy cream. i use superfine sugar in my cake.
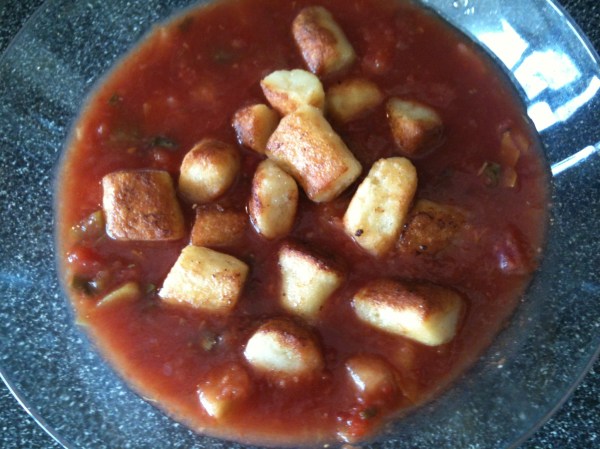
hot gnocchi / cold gazpacho
mushroom soup
adapted from the les halles cookbook, this soup has cremini and white mushrooms, cippolini and red onions and a generous glug of madeira. in the end i couldn’t resist and added some butter browned gnocchi at the last minute. you can add shiitake mushrooms and substitute shallots or vidalia onions. i tend to use madeira or white port instead of sherry. if you don’t puree the soup, you can use it as the base for sauce for rice, pasta or filling for ravioli, etc. thanks to Deb for sharing this workhorse of a recipe with me.
potato gnocchi with bolognese sauce
some unexpected dental work, this week has pressed me hard to come up with soft foods that aren’t sticky and provide comfort. after a few days of soups and rice dishes, gnocchi came to mind. i haven’t made gnocchi in the last few years since i’ve gone gluten free, so i had to think hard to recall the recipe and then think again to figure out it if could work with gluten free flour. this is the result of the first of several tests i’ll be doing with different flour blends. i’m pretty happy with this batch made with Cup4Cup gluten free flour.
one of the best things about the gnocchi is that after you boil them, you can cool them, coat them in olive oil and keep them refrigerated for almost a week.
for the curious i’ll provide a photographic gnocchi tutorial in the post below this one. 


